Don’t fret: Plan Bs can be as fabulous (and cheaper) than plan As.
By Erika Lynde
As you all know, life is getting crazy. If you read my post a few weeks ago, you know a house is in our future. This has pretty much put a wrench into our wedding plans. I’ve been feeling a bit overwhelmed so I decided to try and take my mind off the chaos…light bulb: crafts! Crafts should do it!
Still dreaming of our perfect winter wedding (that I’m praying is still in my future), I figured I’d use this time to catch up on all my DIY wedding plans.
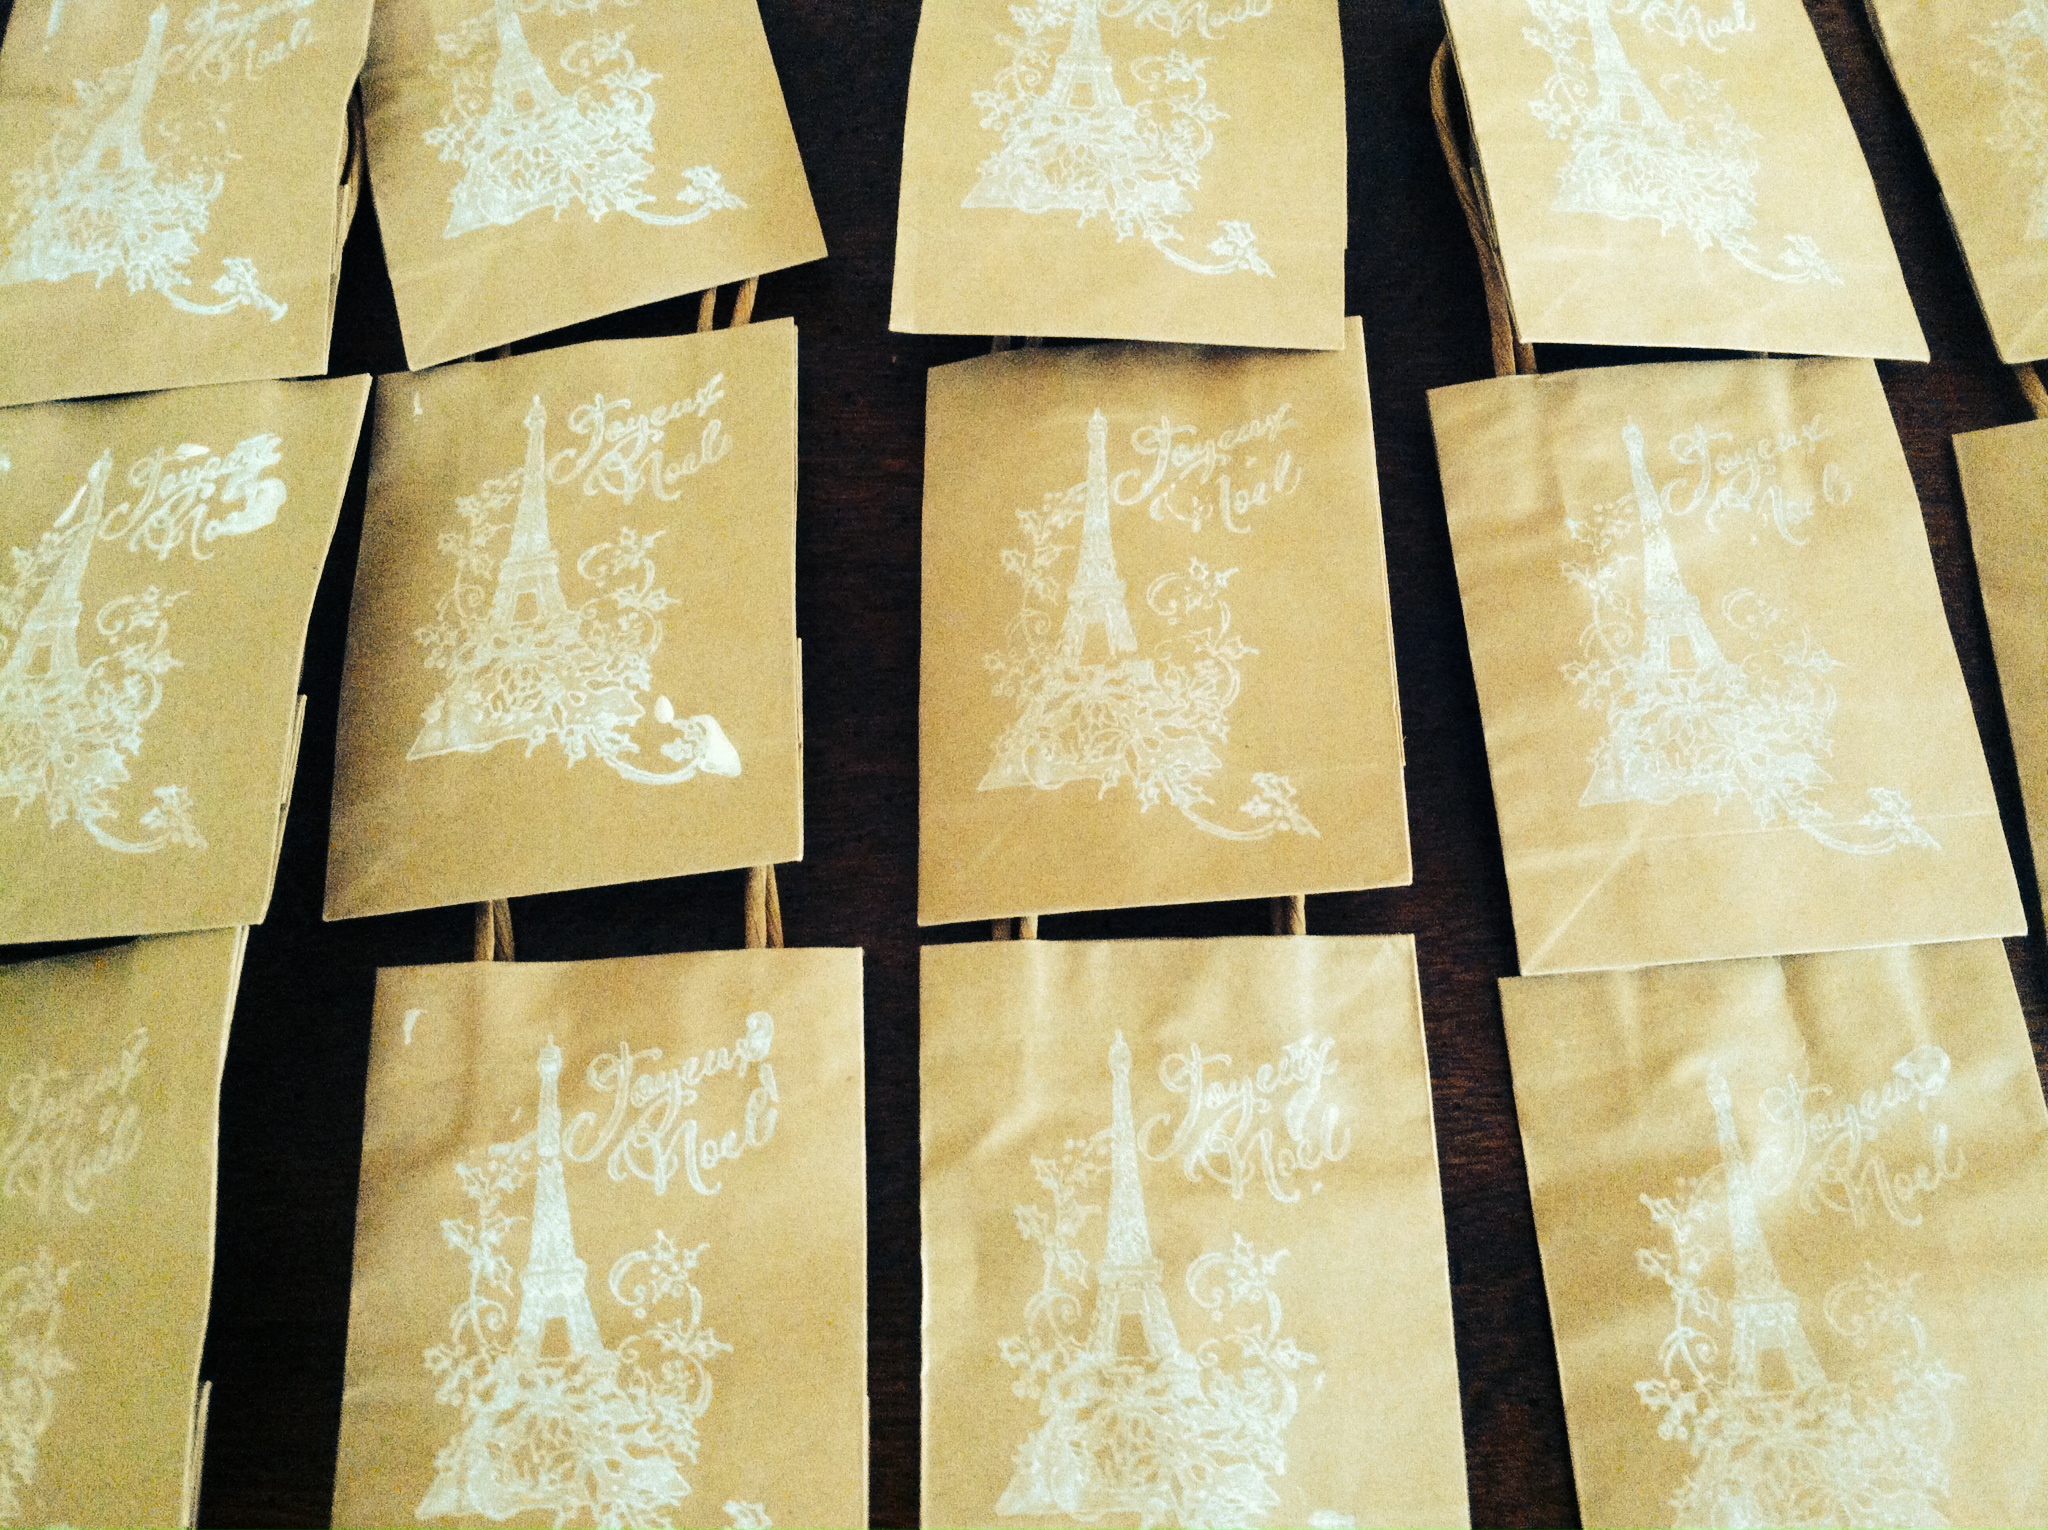
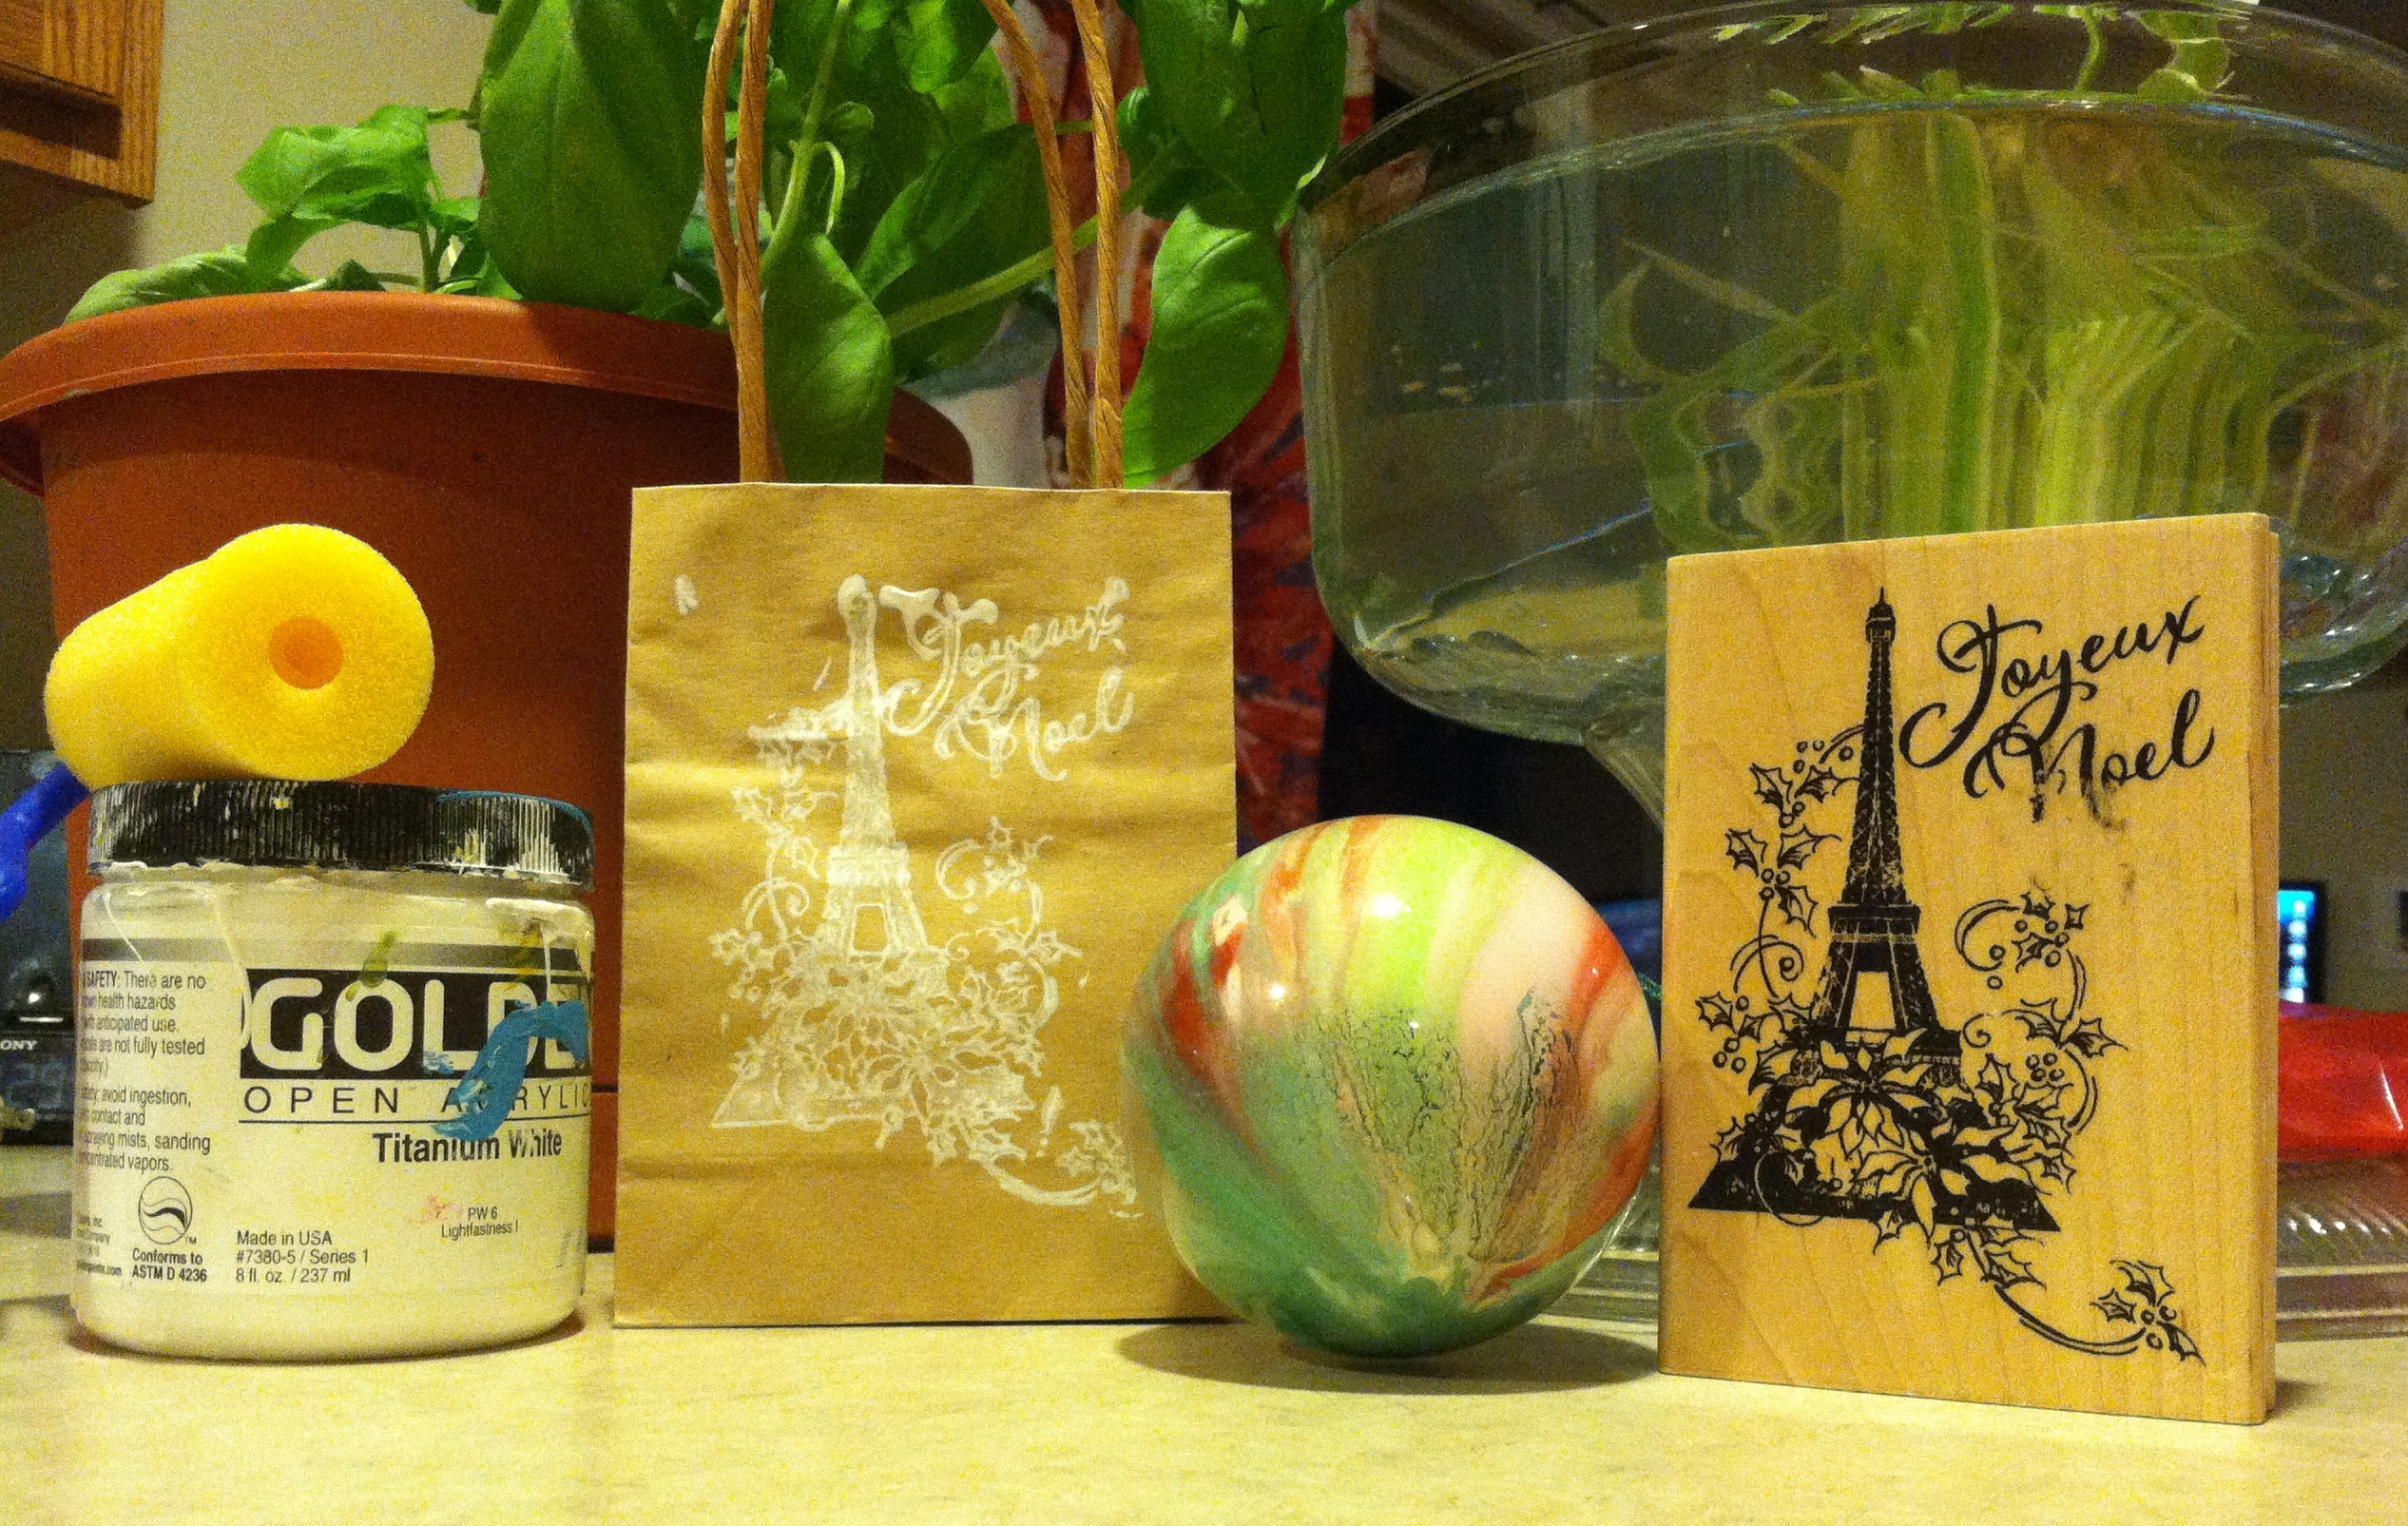
Remember those super fun marbled ornaments I made back in March? Well those little treasures needed an adorable little package to go along with them. I grabbed my keys Sunday morning and set out for AC Moore listening to my early morning, over easy radio station. My first thought on package design was ideally a box for each favor. This way I could package them up as small Christmas presents stacked them under a lit tree: Perfect, adorable and expensive. (Wow, who buys this stuff? Or am I just wicked cheap?) Anyway, in pursuit of plan B, I looked down each aisle for another option to complete my vision. I settled on these tiny brown paper bags. I know, I know! A brown bag doesn’t quite hit the mark for the artsy, vintage-themed wedding I envisioned, so I needed to make more out of its simplicity. Destroying any organization the clearance aisle may have had, I found this fun stamp with a Parisian Christmas theme. This could totally work.
I got home, cleaned off a large workspace and started to make my brown bags as pretty as the ornaments that will go inside of them. Using a roller, the stamp and some acrylic white paint, each impression made its own unique mark. The textile-like result reminds me of the delicate lace that covers my dress, and I like that it’s set on this tough, rustic background. (The beauty of hard and soft lives forever in my fashionista brain — thanks, “Project Runway”).
I’m really happy with how they turned out, and I can’t wait to see them all set up on display.